
TL;DR
This build doesn’t require any “black magic” or hours of frustration like desktop components do. If you follow this blog and its parts list, you’ll have a working rig in 3 hours. These instructions should remove any anxiety of spending 5 figures and not knowing if you’ll bang your head for days.
The Goal
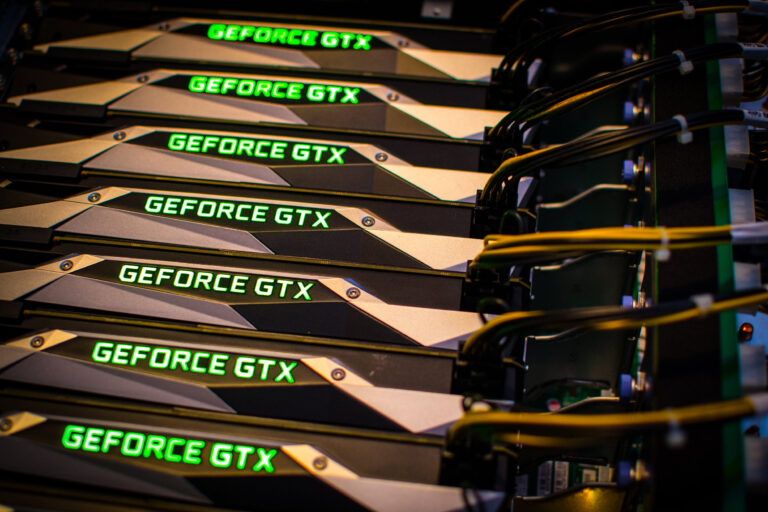
Upgrade our current rig from 6 gtx 970s to 8 gtx 1080. Don’t blow a fuse.
Parts list
Hardware
- Chassis & Motherboard – Tyan Ft77C-B7079 (P/N: B7079F77CV10HR-N)
- CPU – 2 Xeon E5-2620V3 LGA2011 (dont purchase one CPU, 2 are required to control all PCIE slots)
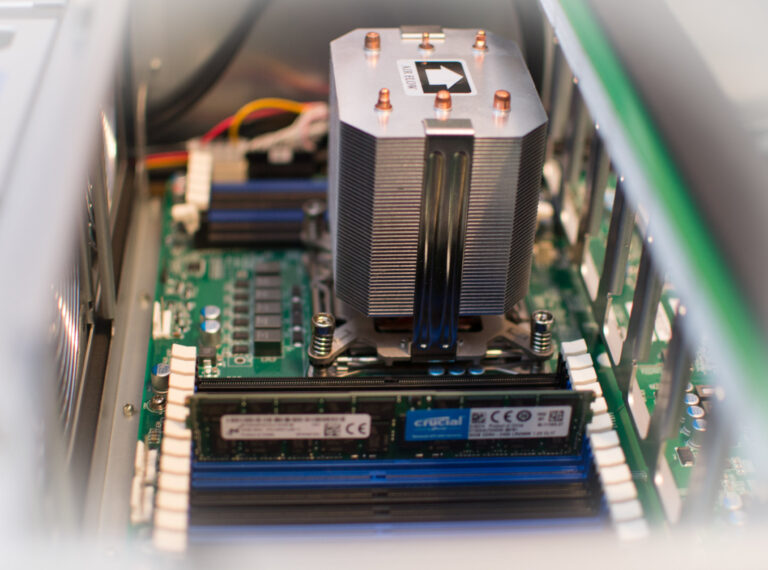
- Memory – 2 32g DDR4 PC2400 288pin LRDIMM
- Hard drive – 1tb Samsung SSD 850 EVO
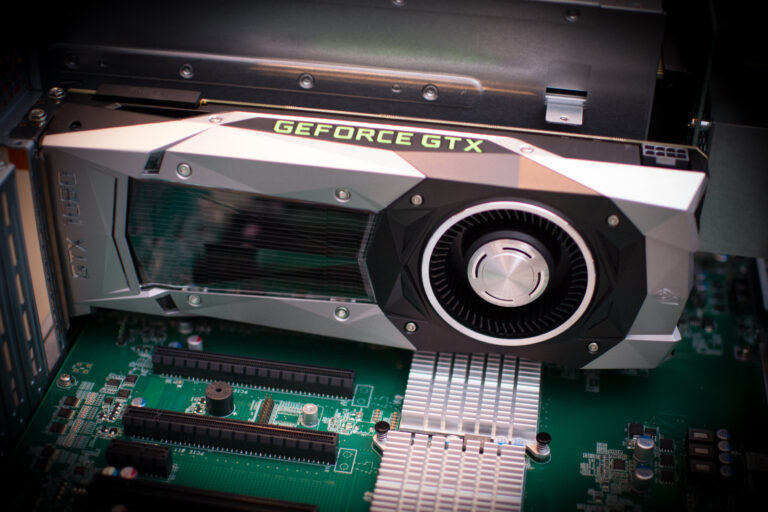
- GPUs – 8 EVGA gtx1080 founders edition (whatever you get, make sure its a founders edition. Sometimes called a reference card/edition)
Software
- Ubuntu – 14.04.3 server (x64)
- hashcat – www.hashcat.net
- hashview – www.hashview.io
Assembly
Nowadays building mid-grade to high-end password crackers is like playing with legos, albeit expensive legos.
We did a time lapse of the build:
Build notes
There are few things we learned during the purchasing and assembly.
- You don’t need to purchase a separate heatsink and fan for your CPUs. The Tyan chassis will come with them.
- Tyan chassis comes with brackets that screw into the back of you GPUs to secure them in place. These may not be needed if you never move the box, but it doesn’t hurt to install them. We did.
- Rails are included with the Tyan.
- This chassis doesn’t appear to have a onboard hardware raid. I just assumed it would 🙁
- BIOs didn’t require any modifications or flashing. Came fully updated as of January 2017.
- We disabled the system speaker because it will scream at you if you don’t have all three power supplies plugged in.
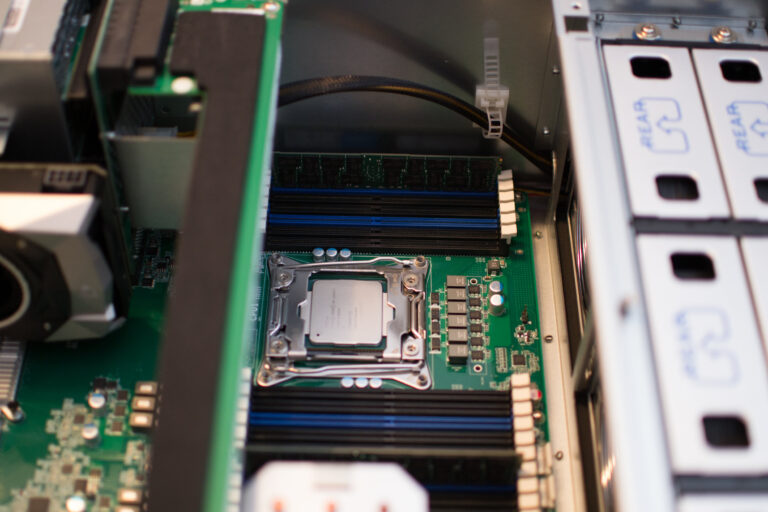
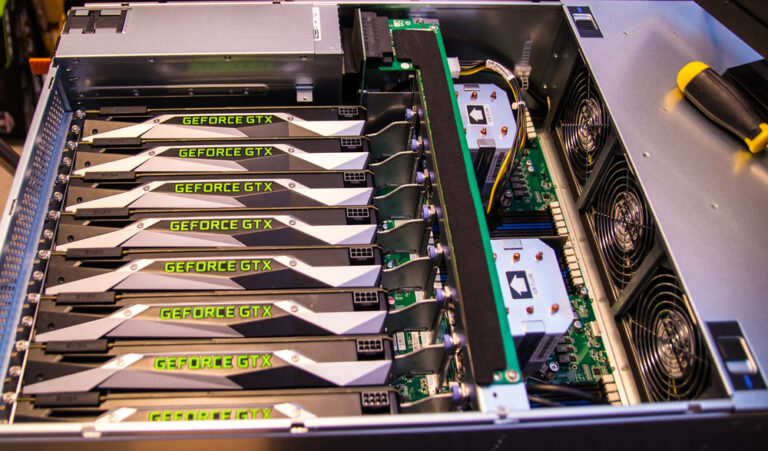
The memory slots are not labeled. Fill the banks similar to this image.
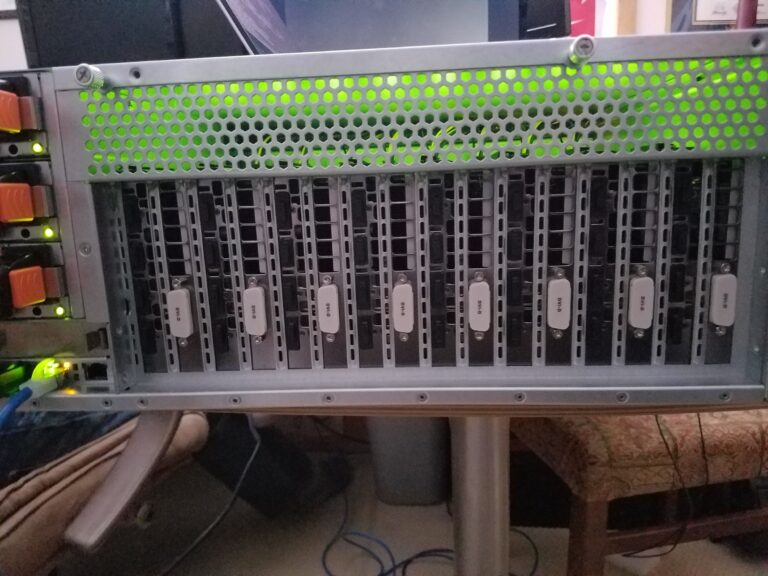
In the image below you can see the brackets that attach to the rear of the GPU for added support. Probably not needed but if you were to ship this rig I’d install them. This thing is HEAVY!
Software Install
We had no hardware issues but we installed one GPU, booted the system, and once we verified it could POST with no issues, we started installing the OS. Once Ubuntu finished installing, we later reinstalled all GPUs. Since things went so smoothly, next time I’d just fully install all GPUs and fire it up. Nothing to worry about.
Install Ubuntu 14.04.3 Server (x64)
Not going to cover this in detail. But here are few things we considered.
Use LVM
We chose not to encrypt whole disk or home directory. We generally make an encrypted volume later.
Choose ‘OpenSSH Server’ from software selection screen (one less step post install)
Once OS is installed, verify GPUs are detected by OS:
lspci | grep VGA
Update and install dependencies for drivers and hashcat
sudo apt-get update && apt-get upgrade
sudo apt-get install gcc make p7zip-full git lsb-core
Download and install Nvidia drivers and Intel OpenCL runtime
Download Nvidia drivers. Nvidia 375.26 was current at the time of this build (January 2017).
UPDATE 4/10/2017 – If using 1080 Ti, use driver 378.13
wget http://us.download.nvidia.com/XFree86/Linux-x86_64/375.26/NVIDIA-Linux-x86_64-375.26.run
chmod +x NVIDIA-Linux-x86_64-375.26.run
sudo ./NVIDIA-Linux-x86_64-375.26.run
If you get warning messages about x86 you can ignore them. Here’s an example of one:
WARNING: Unable to find a suitable destination to install 32-bit compatibility libraries. Your system may not be set up for 32-bit compatibility. 32-bit compatibility files will not be installed; if you wish
[Cto install them, re-run the installation and set a valid directory with the –compat32-libdir option
Install OpenCL runtime (not required but why not, use those CPUs too)
wget http://registrationcenter-download.intel.com/akdlm/irc_nas/9019/opencl_runtime_16.1.1_x64_ubuntu_6.4.0.25.tgz
tar -xvf opencl_runtime_16.1.1_x64_ubuntu_6.4.0.25.tgz
cd opencl_runtime_16.1.1_x64_ubuntu_6.4.0.25
./install.sh
Install hashcat – www.hashcat.net
wget https://hashcat.net/files/hashcat-3.30.7z
7z x hashcat-3.30.7z
cd hashcat-3.30
Test hashcat by running a benchmark…at 341 GH/s!!!!
meatball@kraken3:~/hashcat-3.30$ ./hashcat64.bin -m 1000 -b
hashcat (v3.30) starting in benchmark mode…
OpenCL Platform #1: NVIDIA Corporation
======================================
* Device #1: GeForce GTX 1080, 2028/8113 MB allocatable, 20MCU
* Device #2: GeForce GTX 1080, 2028/8113 MB allocatable, 20MCU
* Device #3: GeForce GTX 1080, 2028/8113 MB allocatable, 20MCU
* Device #4: GeForce GTX 1080, 2028/8113 MB allocatable, 20MCU
* Device #5: GeForce GTX 1080, 2028/8113 MB allocatable, 20MCU
* Device #6: GeForce GTX 1080, 2028/8113 MB allocatable, 20MCU
* Device #7: GeForce GTX 1080, 2028/8113 MB allocatable, 20MCU
* Device #8: GeForce GTX 1080, 2028/8113 MB allocatable, 20MCU
Hashtype: NTLM
Speed.Dev.#1…..: 42896.1 MH/s (62.48ms)
Speed.Dev.#2…..: 42604.1 MH/s (62.97ms)
Speed.Dev.#3…..: 42799.0 MH/s (62.57ms)
Speed.Dev.#4…..: 42098.9 MH/s (63.68ms)
Speed.Dev.#5…..: 42871.5 MH/s (62.57ms)
Speed.Dev.#6…..: 42825.0 MH/s (62.64ms)
Speed.Dev.#7…..: 42848.9 MH/s (62.54ms)
Speed.Dev.#8…..: 42449.8 MH/s (63.16ms)
Speed.Dev.#*…..: 341.4 GH/s
Started: Mon Feb 13 17:54:12 2017
Stopped: Mon Feb 13 17:54:31 2017
Install hashview – www.hashview.io
Install dependencies
sudo apt-get update
sudo apt-get install mysql-server libmysqlclient-dev redis-server openssl
mysql_secure_installation
Optimize the database
vim /etc/mysql/my.conf
Add the following line under the [mysqld] section:
innodb_flush_log_at_trx_commit = 0
Restart mysql
service mysql restart
Install RVM – (commands below are from https://rvm.io/rvm/install)
gpg –keyserver hkp://keys.gnupg.net –recv-keys 409B6B1796C275462A1703113804BB82D39DC0E3
\curl -sSL https://get.rvm.io | bash -s stable –ruby
Download and setup Hashview
git clone https://github.com/hashview/hashview
cd hashview
Install gems (from Hashview directory)
rvm install ruby-2.2.2
gem install bundler
bundle install
Setup database connectivity
cp config/database.yml.example config/database.yml
vim config/database.yml
Create database
RACK_ENV=production rake db:setup
In another terminal or screen session, kick off resque
RACK_ENV=production TERM_CHILD=1 QUEUE=* rake resque:work
note: In production mode no output will be displayed until a job has started
Run Hashview
RACK_ENV=production ruby hashview.rb
Crack Hashes
Start a job and start cracking!
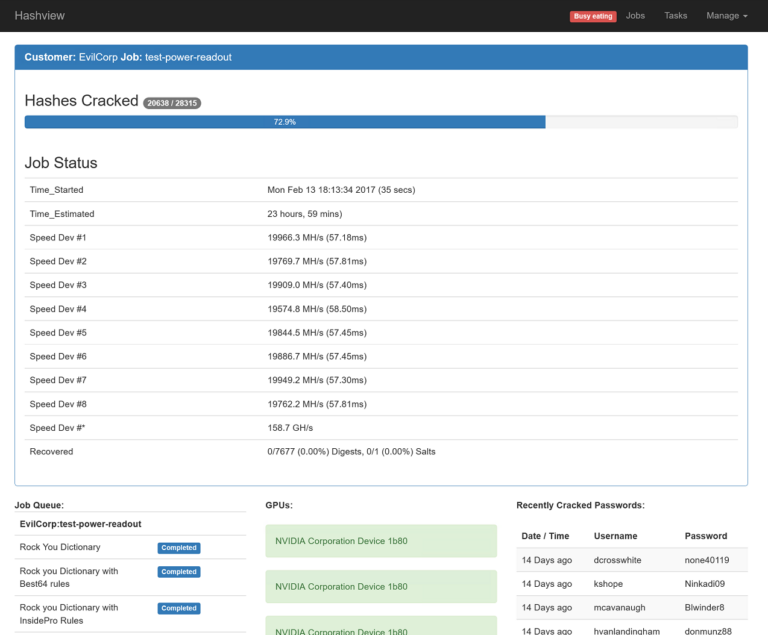
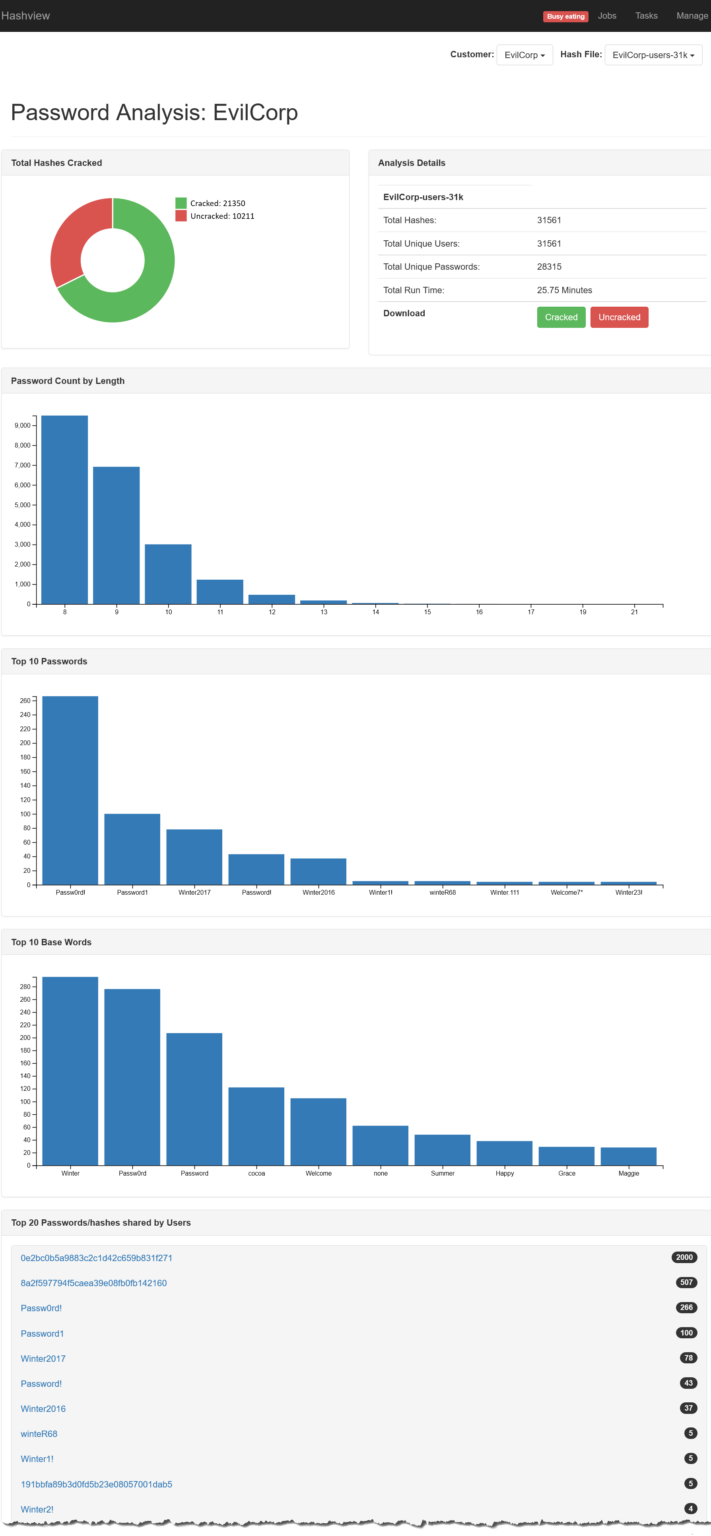
Then intensely watch analytics in realtime while sipping on your favorite cocktail


Stay tuned…
We just bought our second 8 GPU rig! In a future post we’ll show you how to easily support distributed cracking using Hashview.
@caseycammilleri


